Sublimation On Metal/Aluminum Sheets In Two Ways
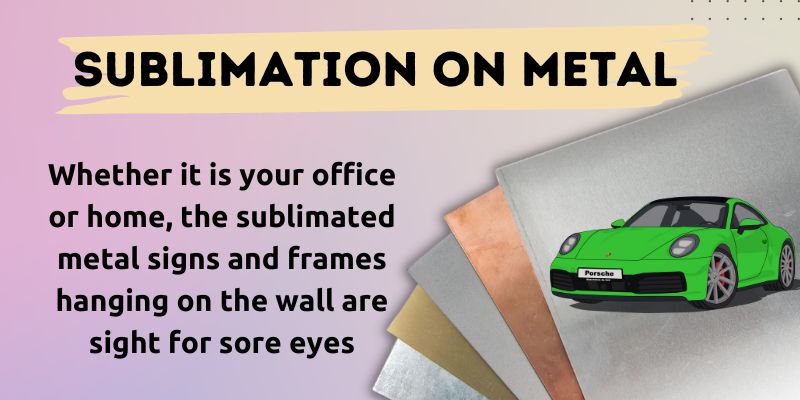
Whether it is your office or home, the sublimated metal signs and frames hanging on the wall are sight for sore eyes. But before embedding your personalized images, you should know the appropriate method, time, and temperature to do sublimation on metal and what type of metal or aluminum sheets, tumblers or galvanized metal you can sublimate on. So let’s go ahead and start sublimating metal.
Sublimation On Metal Or Aluminum Sheets
As we know sublimation is all about dye ink that infuses into the substrates. Polyester is known as the best compatible substance with sublimation but for the hard substrates, we’ll use the poly-coated sublimation metal that is factory-made.
On the other hand, if you want to sublimate on galvanized metal then get the dollar tree galvanized metal signs or plates, and do not forget to laminate them with a thermal laminating sheet. To prepare the dollar tree signs, just heat press the lamination sheet on the substrate for 10 seconds.
Supplies Needed
- A sublimation printer – You can use a mug sublimation printer or a beginner sublimation printer. I’m using ET-15000
- Sublimation paper – to get the design printed on. A-sub paper
- Sublimation inks – according to the model of your printer. Hiipoo (Recommended)
- A flat surface heat press – to press substrate. Although you can use a Cricut Easy press too.
- Heat-resistant tape
- Heat-resistant gloves
- Metal substrates – according to your choice either it can be a metal tag, tumbler, frame, tumbler, or keychain.
- Sublimation coating for metal (Optional) If you’re sublimating non-poly coated metal then you should use a polyacrylic coat or lamination sheet onto the substrate. Usually, the metal substrates come non-coated. However, I’ve used a lamination sheet which is perfect for me.
Step By Step Guide
Step 1: Design the image
Design your image or download it from free resources like freesvgdesign design it and prepare it according to the size of your substrate. Now print the design on the sublimation paper by utilizing your sublimation printer.
Step 2: Prepare the metal
Although I’m using galvanized metal so I’ll laminate it first with a thermal laminating pouch. If you’re using metal coated with polyester or polycrylic then you can simply ignore this step and go ahead with printing from step 3.
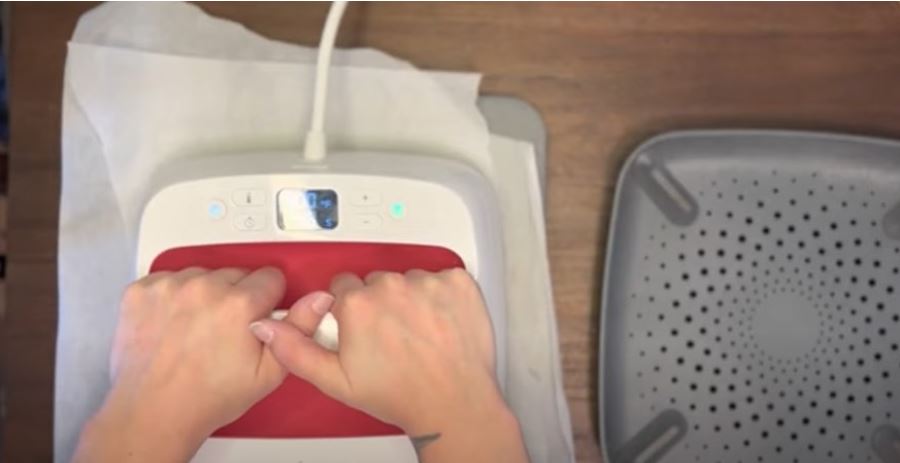
Take the heat press mat and place the butcher paper over it now place the metal sheet over the butcher paper.
Put the matte side of laminating sheet onto the side of the metal sheet that you want to sublimate and press it for 20 seconds at 400F. Do not forget to cover the laminating sheet with butcher paper.
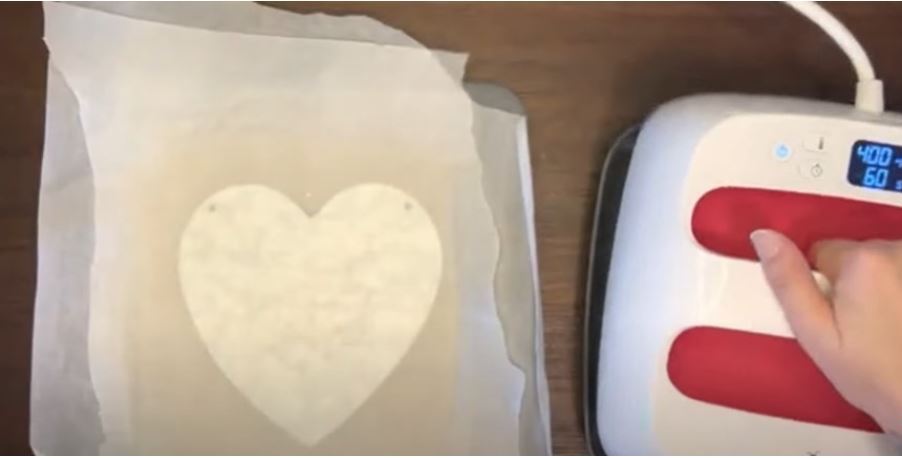
Step 3: Secure
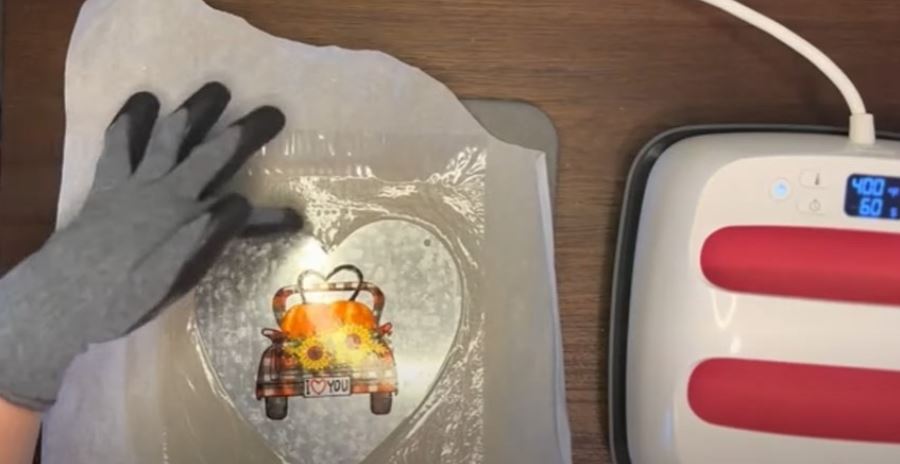
I’ve printed my sublimation design and now adhere the printed sublimation paper facing down the metal sheet and secure it with heat-resistant tape firmly and put the butcher paper over it. Press the metal for 60 seconds at 400F.
Step 4: Final Output
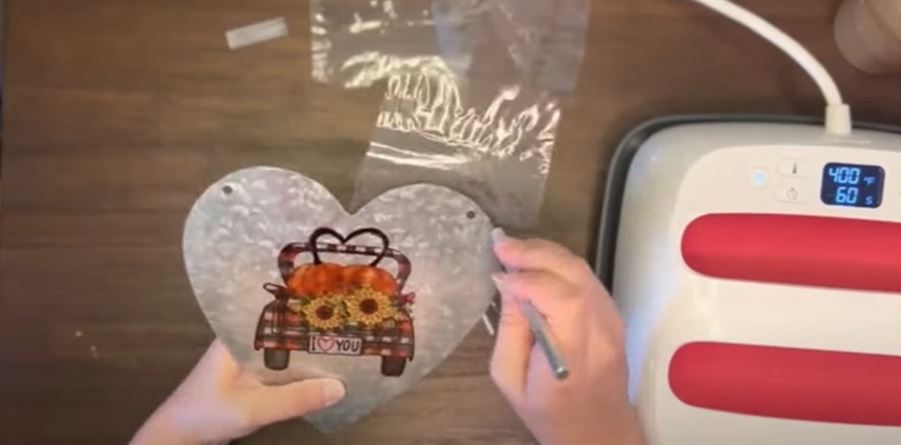
Now ensure to wear heat-resistant gloves because the metal will be enough hot that can lead to burning of hands. Remove the sublimation paper gently and the metal is ready.
But we need to cut the excess sides of the lamination sheet to bring a smooth look. So use the X-acto knife to cut. Ta-da! Although I’m cutting the excess laminating sheet after sublimation, you can also cut it before sublimation too.
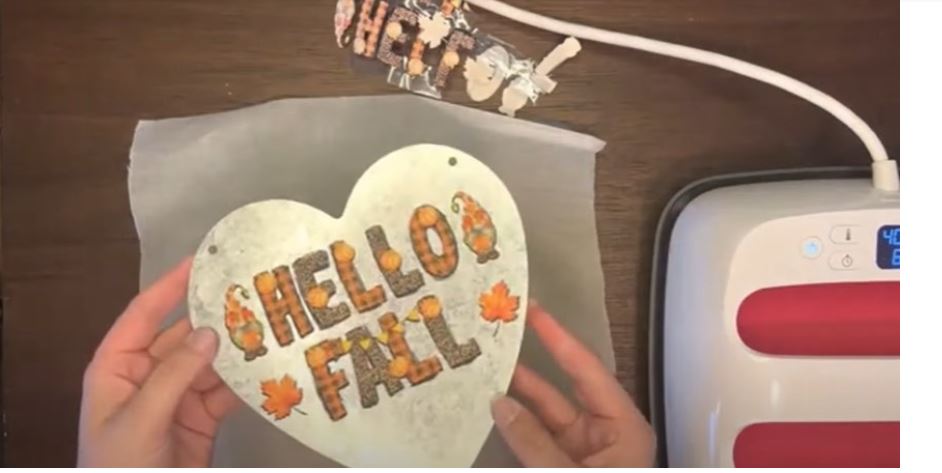
Apart from using a lamination sheet, I’ve also used Cricut HTV and sublimated another side with it. Here are the straightforward steps you can utilize. In this method, you won’t need to use the thermal laminating pouch, but instead, we’ll use HTV as a base for the design.
- You will need to use a Cricut plotter for this process. Simply we’ll use the print-then-cut feature. Calibrate your compatible Cricut sublimation printer.
- Load the Cricut HTV into the Cricut and cut the image you’ve designed. Once the vinyl has been cut, print and cut the same design using print-then-cut onto the sublimation paper.
- Make sure to mirror the image when printing onto the sublimation paper.
- Weed the vinyl design and press it onto the metal substrate for 15 seconds.

- Now place the already cut sublimation printed paper onto the pressed vinyl.
- Press them at 400F for 60 seconds. Let them cool a little bit then remove the sublimation paper.
- And here is the final product!
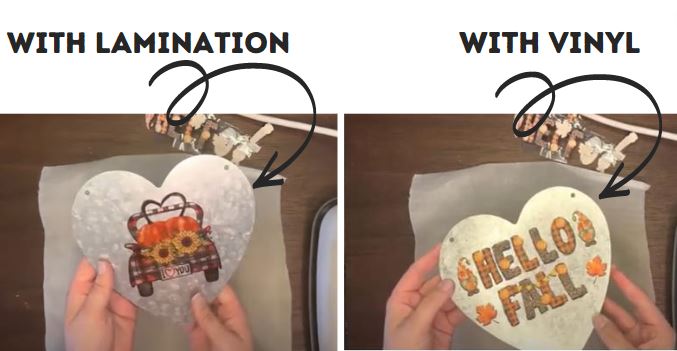
As shown in the image. You can have a look at both sides. One is laminated and then sublimated and the second is sublimated with vinyl. Do let me know in the comments which one looks best.
Check Sublimation On Canvas.
How Durable Is Sublimation Printing On Metal?
Sublimation printing on metal is extremely durable especially on galvanized metal because galvanized metal is protected with a zinc layer that prevents metal from rusting thus extending its shelf life for a long. Sublimation on metal will be water and UV-resistant along with scratch-proof too because the sublimation ink will be infused into the metal’s poly coat.
Conclusion
So yes! You can do sublimation metal and decorate your walls with your own personalized images. Sublimation on versatile substrates has got a boom and you can sublimate almost every hard substrate that is coated with polyester. A prerequisite for sublimating on metal is that the metal substrate should be coated with polyester. Check How To Sublimate A Mug.
But according to my experience, I can perform a hundred alternatives of it. So today I’ve described the two different ways of sublimation on metal using laminate and vinyl. So if you didn’t get any of the coated substrates then you can simply apply the above methods