
How To Bleach A Shirt For Sublimation Without Sun
Utilizing sublimation printing on different colors like black, red, purple, and pink is a great idea. But sublimation on dark or any other color is not possible without bleaching. So, to sublimate on any other color you must need to bleach those shirts. Also, you need to play around with some chemicals and other stencils.
So before getting started, you should know the proper ways to bleach a shirt for sublimation. We’ve tried two different ways on how to bleach a shirt for sublimation without sun.

How To Bleach A Shirt For Sublimation
There are hundreds of ways to bleach a shirt. Some crafters recommend to bleach after sublimation and some before. But the best practice to get vibrant results is to bleach the shirt before sublimation heat transfer. Although we’ll try both methods to show you which one looks best.
Supplies you’ll need
- Bleach bottle
- Spray bottle
- A black shirt or any other color you want to bleach but it should be 100% polyester or 65% of Bella canvas.
- Cardboard – to put between the t-shirt
- Vinyl – To cut the design and place it on the specific area for bleach (optional)
- Cricut – To use print then cut (optional)
- Paintbrush
- Hydrogen peroxide – To stop the bleaching process
- Heat gun – To use instead of sun
- Heat-resistant Tape
- A sublimation printer for t-shirts
- Sublimation papers
- Butcher paper
- Cricut Easypress
- Lint roller
- Paper towel
Step By Step Guide (On Pre-bleached Shirt)
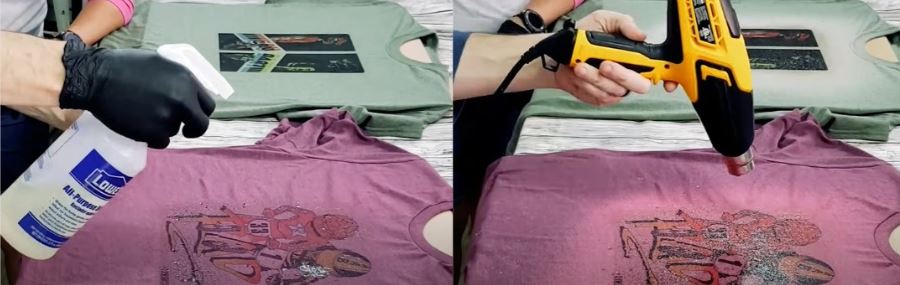
Step 1: Fill the spray bottle
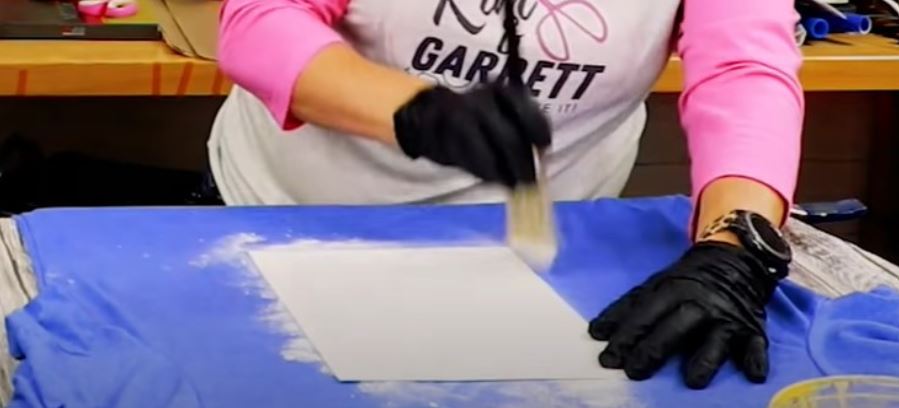
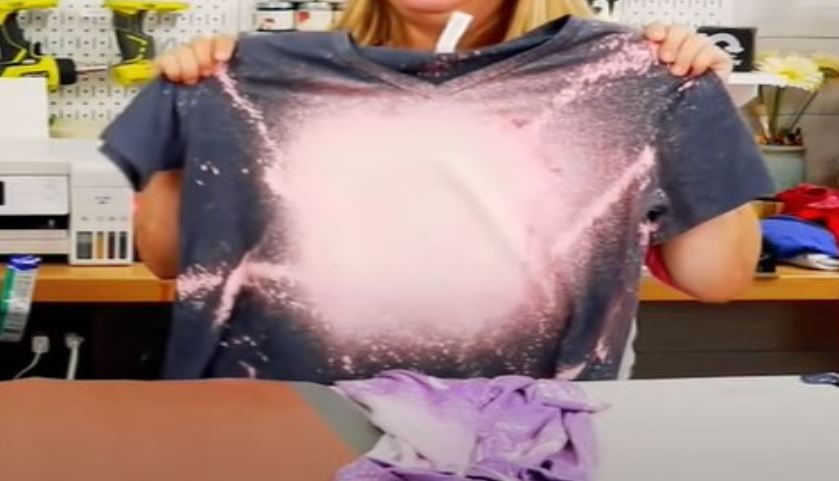
First of all, you need to fill the spray bottle with bleach in order to spray on the t-shirt. Make the wrinkles on the center of the t-shirt by pressing it for only 5 seconds. And place the cardboard in between the t-shirt so the bleach doesn’t go to the backside. Wear gloves before getting started with bleaching.
Step 2: Measure the area
Now, you’ve two ways to spray the area. You can spray directly without measuring the design on the t-shirt. I’ve bleached two t-shirts, one with a spray bottle and the second with a paintbrush. Spray the area that you want to sublimate. The bleach will start changing the color of the fabric immediately. Place the sublimation paper to check the design.
Now the second method is to place the sublimation paper on the t-shirt and apply the bleach to the edges around the sublimation paper with the paintbrush. You can also spray the t-shirt to make the design with bleach. Apply the bleach to the design that we made with the paintbrush. Use the paper towel to dab in order to absorb the excessive bleach.
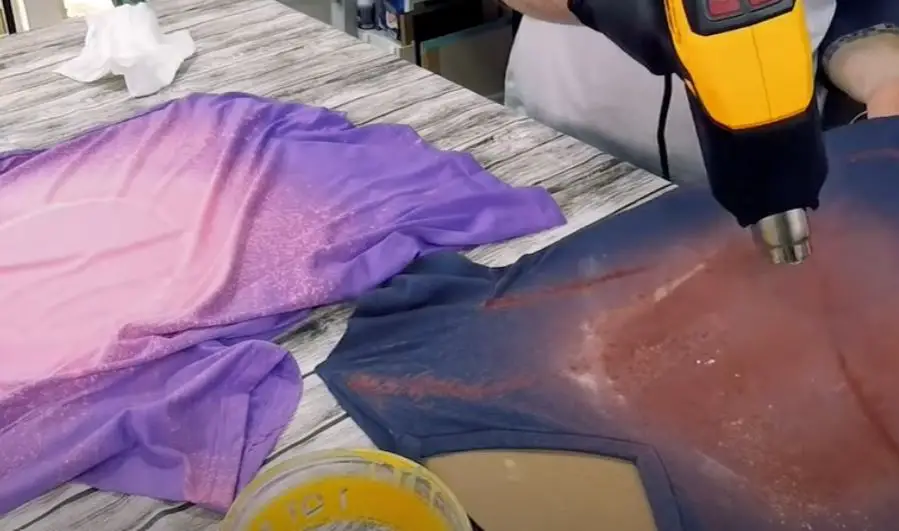
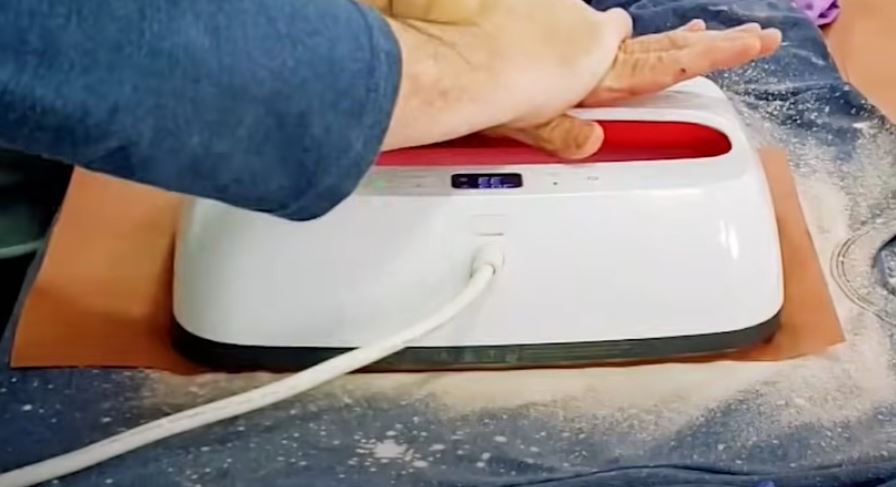
Step 3: Use the heat gun
We won’t use the sun heat to dry out the bleach but instead, we’ve tried the heat gun inside and the results were outstanding. Although, you can use the sun’s heat. You can use peroxide to stop the bleaching process before it turns completely white. But make sure it is a light color.
Step 4: Wash the shirts
After drying the bleach, it’s time to wash the shirts all together with water to remove the chemicals and stop bleaching. Use the tub containing 50% water and 50% peroxide. If you don’t use the tub, then wash in the machine and spray the peroxide after heat pressing otherwise the image will be yellowish.
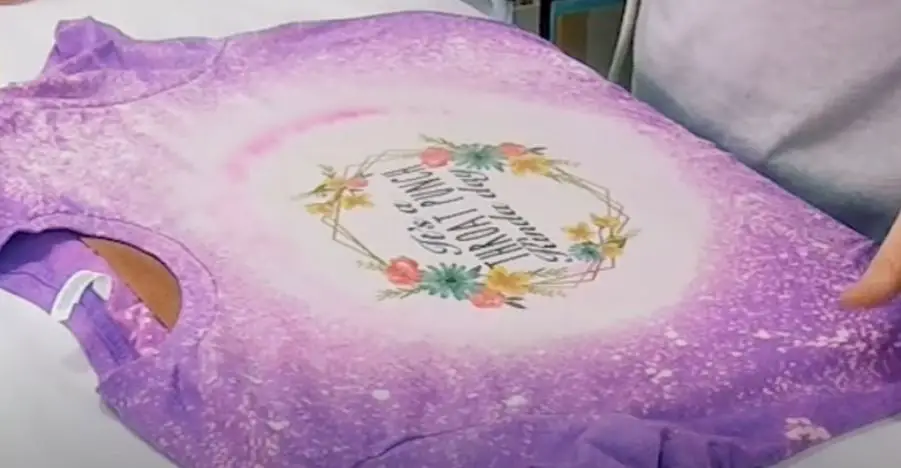
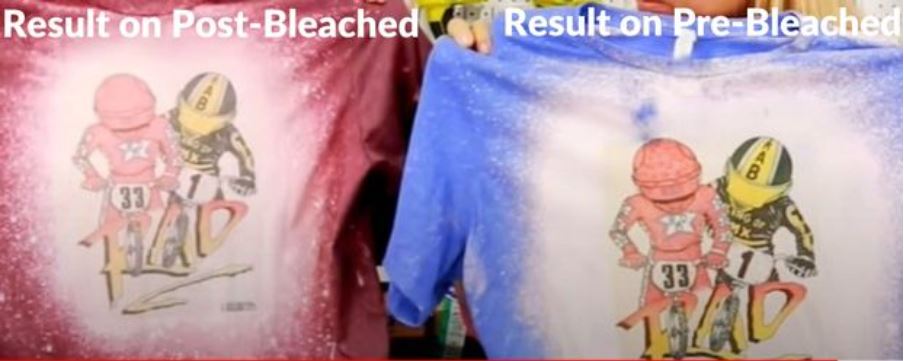
After washing and drying, the shirts are ready to sublimate. I’ve made some beautiful designs with bleach. As shown in the image below.
Step 5: Prepare and print the design
I’ve used Microsoft word to set the design and mirroring out because we’ll need mirror-inverted images to do sublimation. Print the image directly from Microsoft word or you can use any other tool to design. I’m using the same ET-2760 printer which I used to print sublimation on a black shirt in the previous post. I’ve printed several images to show you the results with both method pre-bleached and post-bleached sublimation.

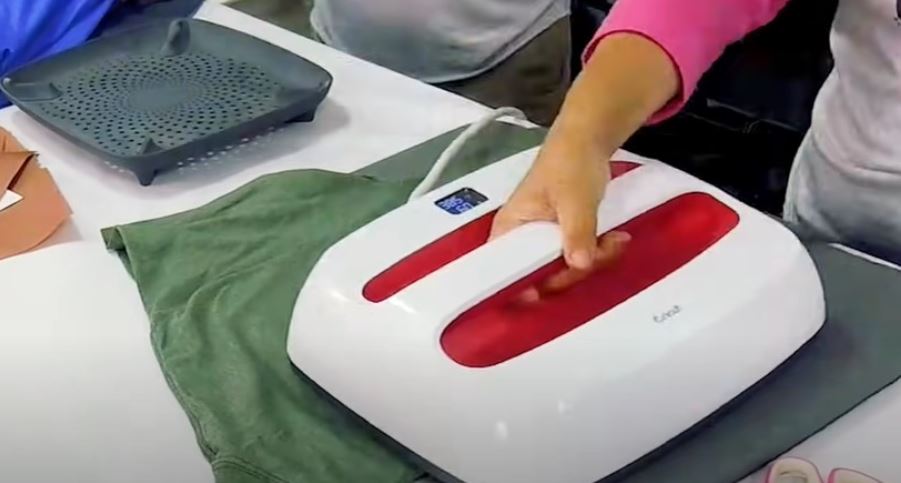
Step 6: Sublimate the shirt
After washing, place the cardboard or butcher paper in between again. Tape down the printed sublimation paper on the bleached part. Clean the shirt with a lint roller and place it over the butcher paper and heat press it for 60 seconds at 385F.
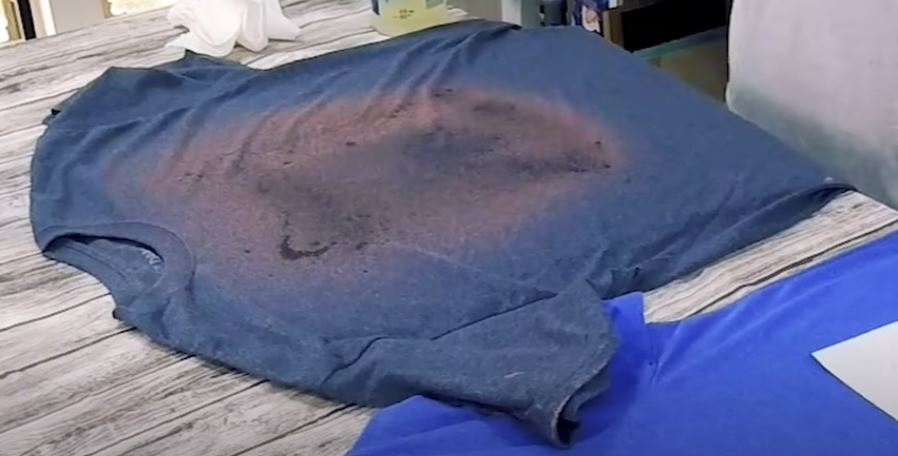
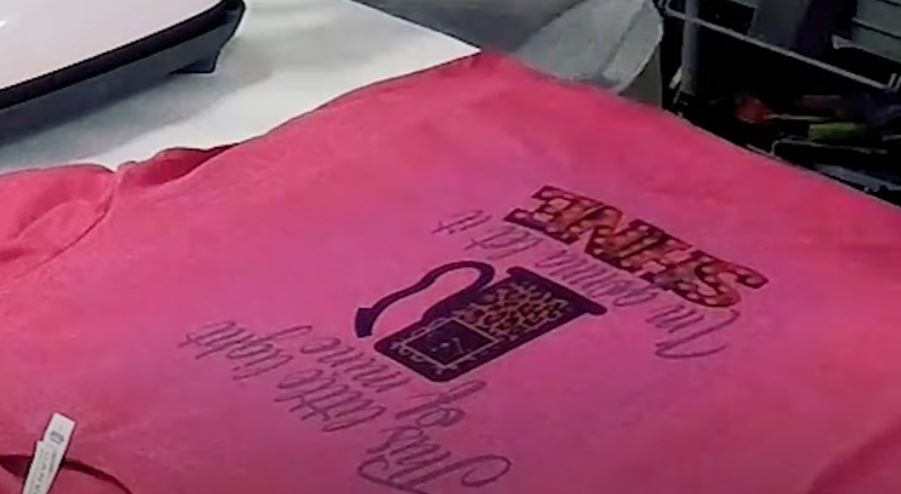
The design and the bleached part of the t-shirt will likely be yellow because I didn’t use peroxide to stop the bleaching because I washed the shirts in the washing machine. After heat pressing, spray the peroxide, place the butcher paper in between and over the surface, and heat press over for 5 seconds the results will be stunning as shown in the image.
How To Bleach A Shirt After Sublimation Printing
This method involves first sublimation printing and then bleach to know which method is best to get exquisite results.
Step 1: Print the design and sublimate
As we mentioned in steps 5 and 6 in the first method, to prepare the design and sublimate it onto the shirt. I suggest reading the 5 and 6 steps above to prepare and sublimate a shirt. Once you sublimate the design on the shirt, Now, prepare yourself for bleaching.
Step 2: Bleaching
Put the cardboard in the t-shirt and fill the spray bottle with bleach. Wear gloves must and respiratory if you need it. Start spraying the shirt, to speed up the process, use the heat gun. And to stop the bleaching, spray the peroxide or you can wash with 50% water and 50% peroxide.
Comparing The Results Of Both Methods
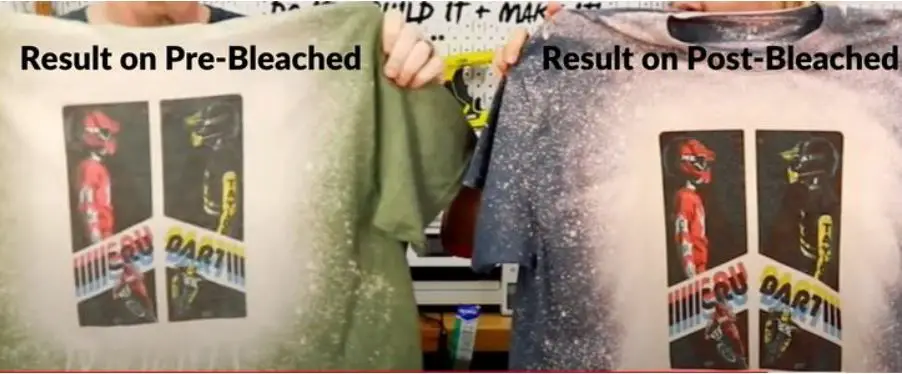
So we’ve bleached and sublimated the shirts in two different ways. Although I knew that the results will be vibrant with pre-bleached shirts. But you can also check the results of both. As the pre-bleached shirts seem more vibrant in the images below.
A Quick Method
There is also another method of bleaching the shirts which we used in the sublimation on black shirts. If you don’t want the outer of the design bleached as shown in the images then you can bleach the only area of the design too. Here are the quick steps:
- Print the design using print then cut the feature on the Cricut design space using a sublimation printer. You should also check the sublimation printer compatible with Cricut.
- Cut the vinyl sheet on the Cricut maker of the same design that you want to sublimate and bleach.
- Place the adhesive vinyl on the center and butcher paper all around the corners of the vinyl.
- Start bleaching and spray the peroxide.
- Wash the shirt and then sublimate on the bleached area.
Frequently Asked Questions (FAQs)
How long does it take to bleach a shirt for sublimation?
This depends upon several facts like what color you’re using, and what type of bleach you’re using. But usually, it will take 15 to 1 hour to show the results after fully drying up.
Why my shirt isn’t bleaching?
Usually, poly-blended shirts take time to show off the results. Repeat the bleaching process 2 to 3 times. That is why I suggest using polyester 100% because it is a synthetic fiber that reacts quickly with bleach.
Conclusion
I hope you enjoyed the detailed guide on bleaching the shirt for sublimation. One is pre-bleached and the other one post-bleached. Both were good but the stunning results were with the pre-bleached sublimation. Many crafters ask to bleach without using the sun and we also tried both methods without the sun instead of using a heat gun. However, using peroxide is essential to stop the bleaching preventing the yellowish transfers.