Why Is My Printer Printing Lines | Epson, Canon, HP
You’re in a hurry for printing your task but all of a sudden you started observing your printer is printing fuzzy white lines that are creating frustration and delay in your work. So you might be wondering why is my printer printing lines and if yes, then what is the reason behind this mess and how to troubleshoot it?
Well, there are various culprits behind the streaks or lines but the main reason is the clogged or broken printhead, dirty printhead nozzles, or if using a laser printer then the image drum may have the lines, dirty fuser, malfunctioning drum unit. Now Read this guide in detail to know the solution.
Why Is My Printer Printing Lines On Pictures Or Through Everything
If you don’t use your printer regularly then you may face your printer printing missing lines throughout everything no matter which brand of printer you’ve. To prevent these common problems read their solutions below.
Check Best Printer Under $200.
Why Is My Printer Missing Or Skipping Lines – Epson, Hp, Canon
No matter whether you’ve Epson, Canon, Or HP, your printer may skip the lines due to several reasons. Your printer may also lead to fade images or blurry documents.
How Do I Fix My Printer Missing Lines – Possible Reasons & Solutions For Inkjet
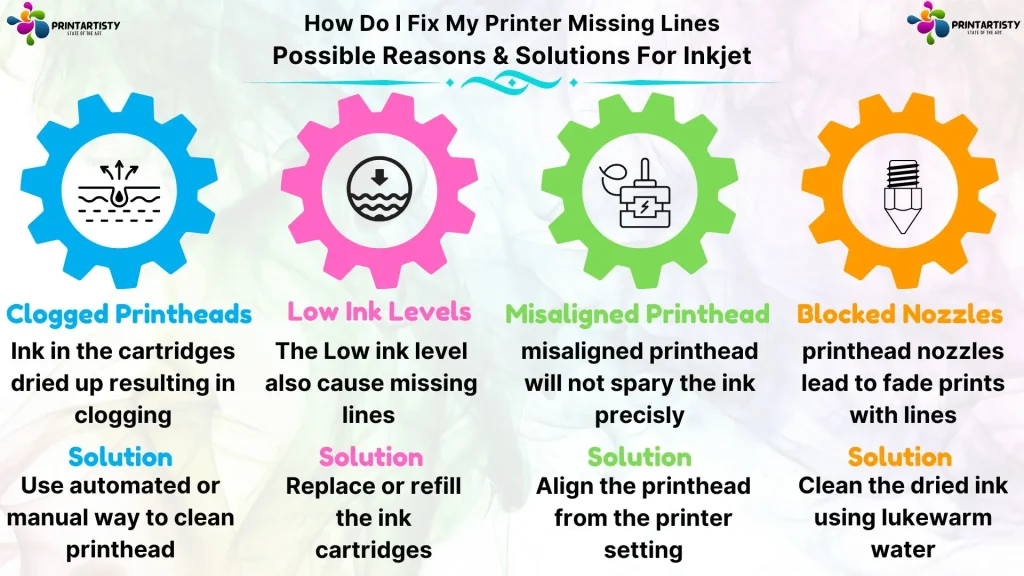
1. Clogged Printheads
Inkjet printers do have a downside that if you don’t need to print frequently then the ink in the printhead starts drying up leading to a clogged printhead which results in missing lines. However, there are various solutions to this problem although inkjet printers also tend to print on regular basis.
Solution: Run The Printhead Cleaning Cycle
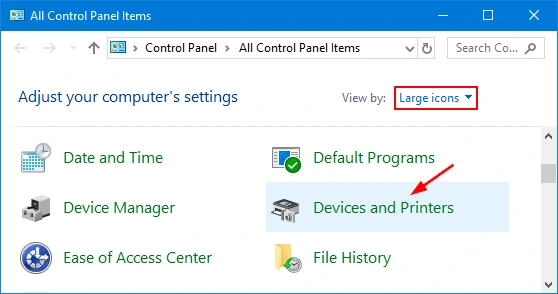
The solution to the clogged printhead is to clean the printhead thoroughly using various ways. The automated cleaning cycle feature is available on many inkjet printers by accessing their control panel or directly using your PC. These running cycles ensure to clean off the printhead jets or nozzles in order to the proper flow of the ink out of the cartridges. Here is how you can perform the cleaning cycle.
Read in detail How To Fix Dry Ink Cartridge.
2. Low Ink Levels
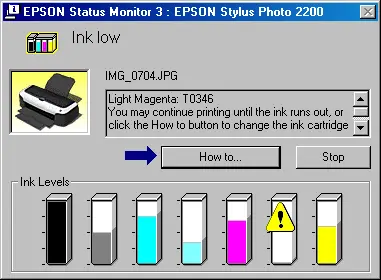
Printing essential documents whilst keeping an eye on the printer ink levels is an excellent practice. The low ink levels cause the missing lines in the printouts because the printer will be unable to deliver clear printouts due to insufficient ink levels.
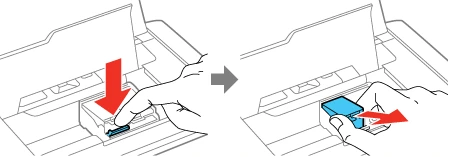
Solution: Replace or Refill The Ink
The solution to the low ink levels is to replace or refill the ink cartridges or ink tanks of the printer.
3. Inappropriate or Misaligned Printhead
The accurate position of the printhead ensures the correct output of the printer. Because the printhead is responsible for spraying the ink droplets. If it doesn’t have the accurate position then your prints may have missing or uneven lines because it will not print the accurate texts due to a misaligned position.
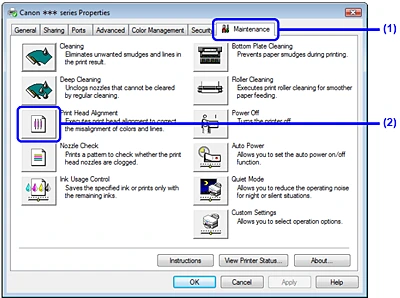
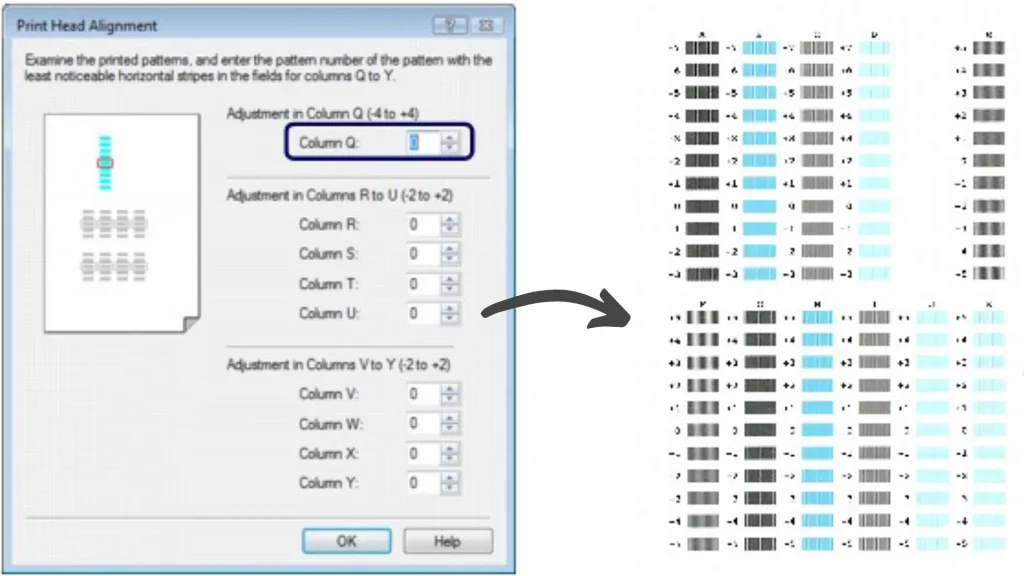
Solution: Run The Printhead Alignment Setting
You can adjust the printhead position manually or automatically. The automated process is similar to the running cleaning cycle. However, the options may be slightly different but you can access the printhead alignment setting from the printer’s maintenance or navigation.
Although the setting may vary depending on the printer model, brand, and operating system you’re using. Here are the steps you can follow. Additionally, you can adjust the printhead manually by accessing it.
4. Blocked Nozzles
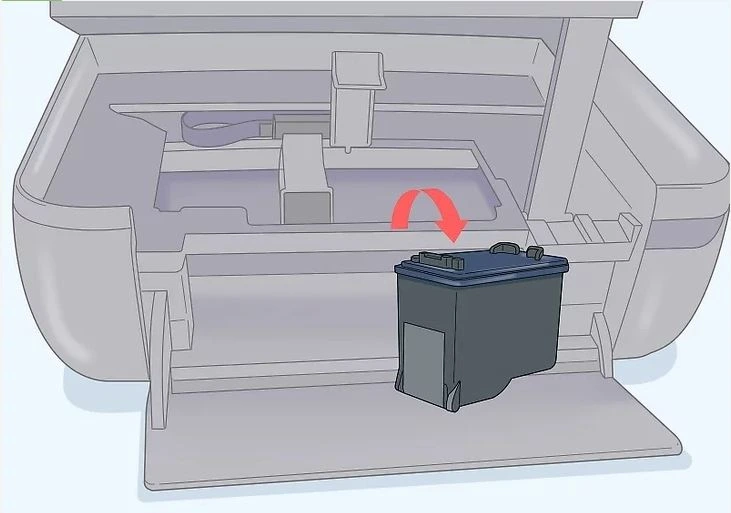
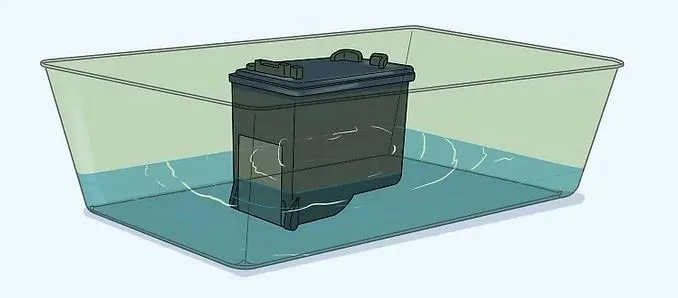
Inkjet printhead nozzles are often prone to blockage due to ink drying as mentioned above. Blocked printhead nozzles will also lead to uneven lines. For the first reason, we explained how can you clean the printhead by running the automated cleaning cycle. However, blocked nozzles often may not be cleaned by the automated cleaning cycle. So the best method is manually cleaning the nozzles.
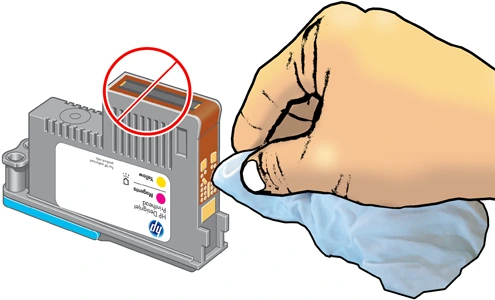
Solution: Clean The Dried Ink
We suggest this method only when the automatic cleaning cycle doesn’t work for you and you haven’t used your printer for a long time. Here are the steps you should follow.
Check How To Keep Ink Cartridges From Drying Out.
Reasons And Solutions For Laser Printer
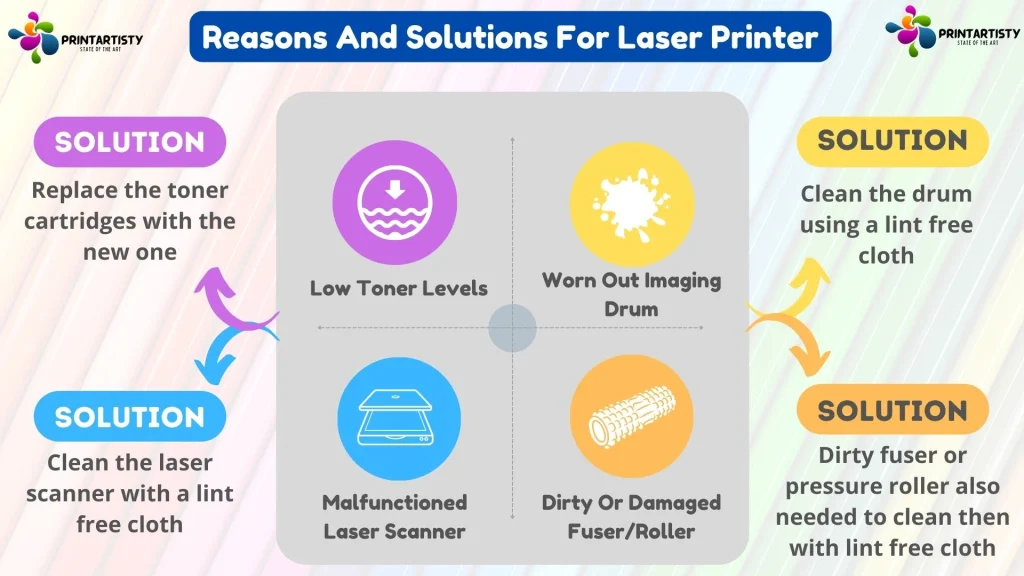
1. Low Toner Levels
Unlike inkjet printer models, laser printers utilize toner cartridges that are in powdered form. When the toner ink levels are running low you might get faded and blurry prints.
Solution: Replace The Toner Cartridges
Unfortunately, the toner cartridges cannot be refilled with the ink but rather they can be replaced if they’re running out of ink. Besides, the process of replacing the cartridges is similar to the inkjet printers by accessing the printer.
Check Best Printer Under $250 & $300.
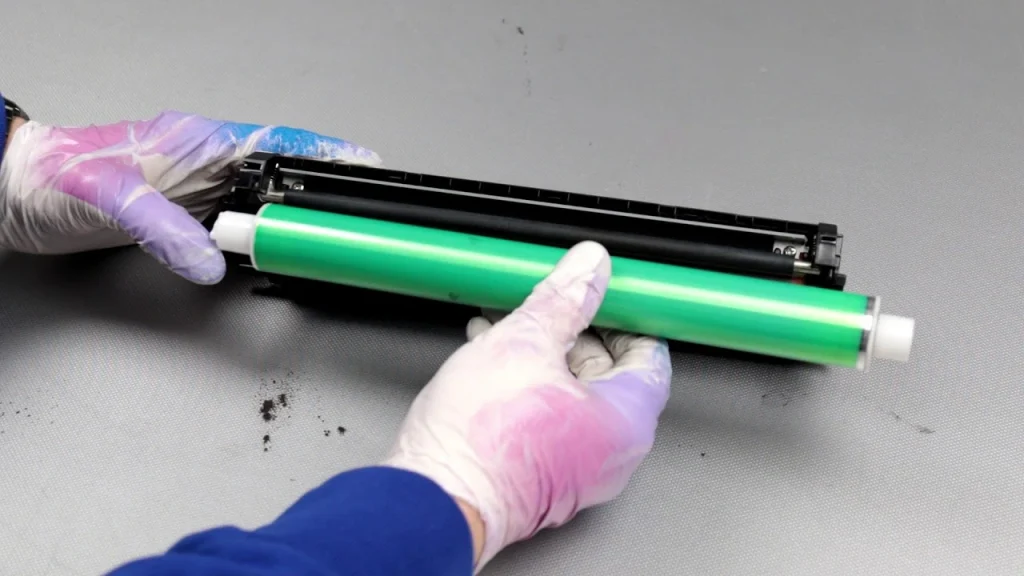
2. Dirty or Worn Out Imaging Drum
An imaging drum (a green cylinder) in the laser printer is responsible for transferring the toner powder thoroughly onto the paper according to the design during the printing process. First, the image is formed onto the drum that is desired to get transferred and then it rotates to form the image.
So you’ve got an idea of the image drum function. Now you can imagine how crucial is the image drum in printing smooth printouts. Over time, the image drum may get dirt or debris or it may wear out too badly affecting the quality of the printouts.
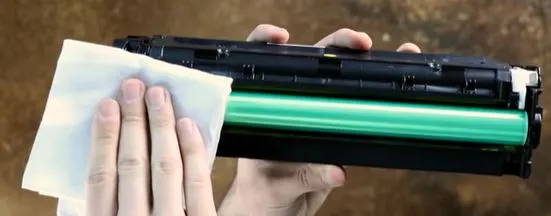
Solution: Clean the Drum Or Replace
3. Malfunctioned Laser Scanner
The laser scanner inside the laser printer uses a laser beam to create the image onto the drum by scanning the image which is equally important as the imaging drum because it is responsible to form the image. However, when it gets faulty or malfunctions then it eventually results in the printing missing lines or other printing issues.
Solution: Replace It or Clean
The simple solution to this problem is to clean the lenses and mirror of the laser scanner by accessing it. Do not use rubbing alcohol this time during the cleaning process.
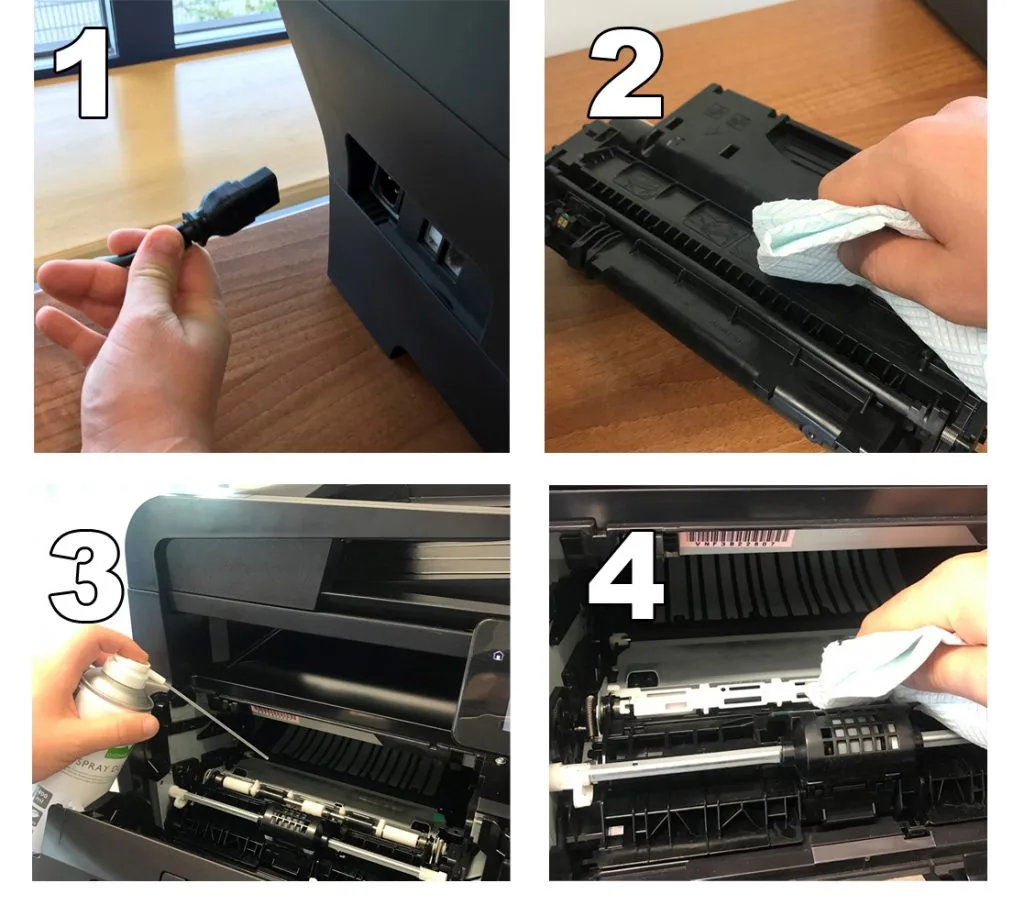
4. Dirty Or Damaged Fuser/Roller
A fuser is a roller, a heating component of a laser printer that melts the toner particles using the heat when the paper passes through it during the printing process. What if the fuser is malfunctioning and is not melting the toner particles and fusing them properly onto the paper?
Of course, this does make sense that the printouts will not be cleared and they may have streaks. Another component is the pressure roller that applies pressure in order to press the paper to get the toner fused from heated roller. They both combine to deliver exceptional and clear performance.
Solution: Clean Them
The cleaning process is the same using a lint-free cloth whether it is the imaging drum, laser scanner, or the fuser and rollers. If the cleaning is not working on the components then hiring a printer technician will be the best bet for you to check whether the fuser or imaging drums are worn out or not. Because replacing yourself these essential printer components can lead to further damage to the printer.
However, you can check the performance of the fuser and rollers by printing the documents. If the toner distribution is uneven on the page with missing lines then chances are the pressure roller is not applying the appropriate pressure or the fuser is not melting the toner evenly.
Read More Advantages And Disadvantages Of Laser Printer.
Conclusion
Whether your printer is inkjet or laser, you may face the printing lines during the printing. But you can troubleshoot them by checking the above-mentioned reasons and if you inspect found one of them, then simply apply the steps that are thoroughly described. By maintaining the printer, you can prevent these common printing problems. You can read why is my printer printing pink.
Over time, the printer can experience malfunctions in the components but you should investigate and solve them to ensure your printing journey is smooth like butter.