How To Fix Dry Ink Cartridge In Two Ways
So your printer is suffering to print smooth images and having banding issues and uneven lines or you haven’t used your printer for a long time which has caused the ink to dry up in the cartridges. However, there are several ways that keep ink cartridges from drying out. But still, if the ink has dried up in the cartridges then you should know the proper ways how to fix dry ink cartridges within a few seconds.
How To Fix Dry Ink Cartridge
Well, I’ve discussed the two possible ways to clean the clogged cartridges. One is letting the printer clean and run the cleaning cycle and the second is manually removing the cartridges from the printer. But keep in mind second manual method is only applicable to the cartridges that have built-in printheads. You can check this if your printer is skipping lines during printing.
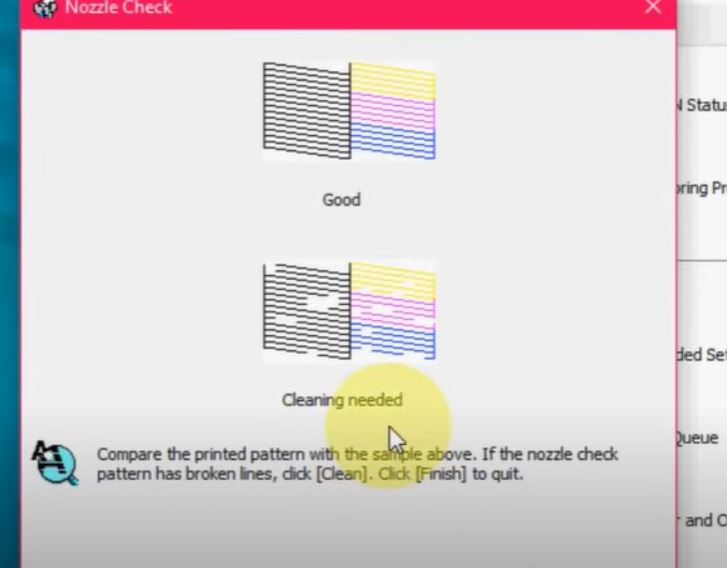
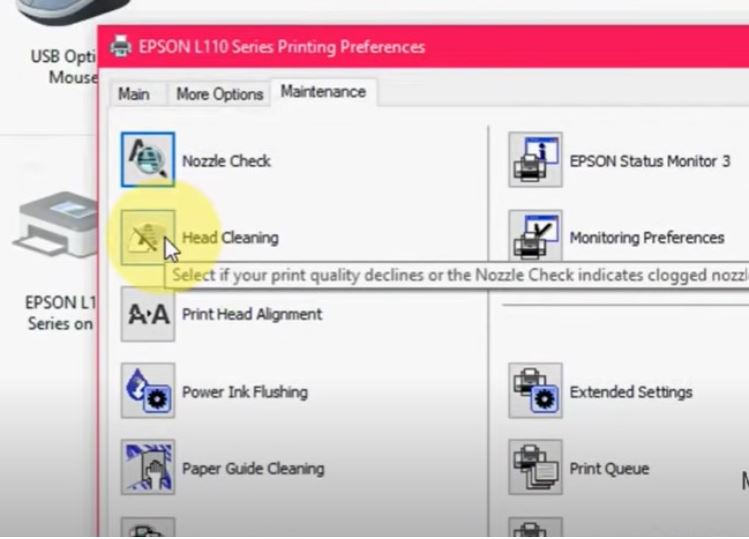
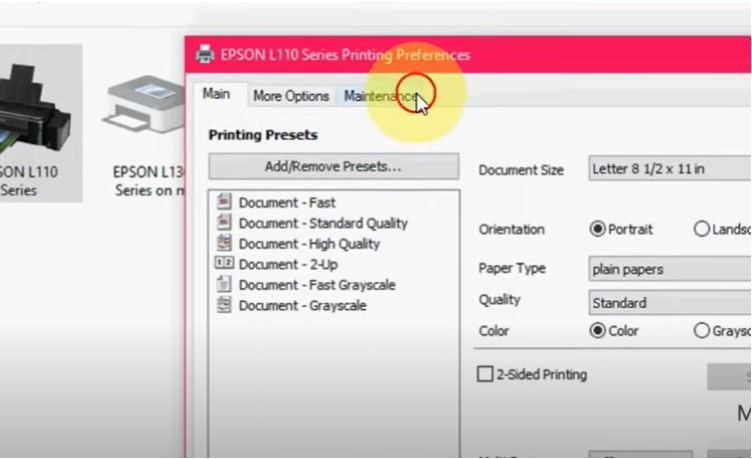
1. Running The Printhead Cleaning
This method can be applied via your computer using the maintenance of the printer in the printer software or you can also perform the tasks via the LCD display of the printer if your printer is equipped with that.
On the other hand, low-end printers would have various buttons including a stop button that allows performing the cleaning task by simply holding it for 5 seconds. But make sure the printer should be turned on. Here are the simple steps to follow for Windows or Mac users.
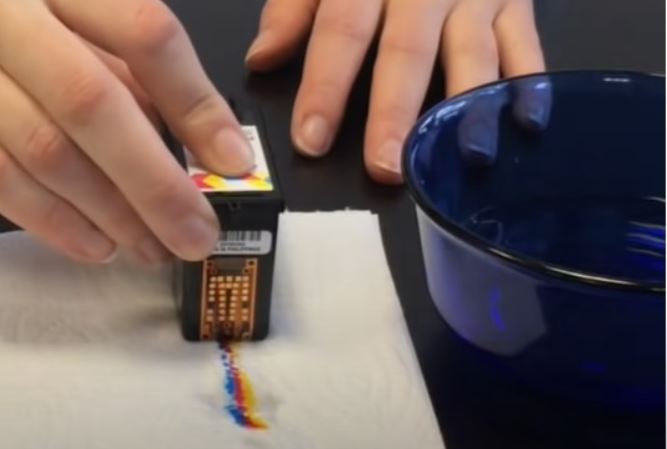
2. Manually Cleaning By Soaking The Cartridges In Warm Water
While this method involves lukewarm water to clean the dried-up ink from the ink cartridges.
Step By Step Guide
1- Take a clean paper towel, dampen it, and place it onto a clean surface.
2- Now take the clogged cartridge and place the cartridge nozzle facing down towards the dampened paper towel.
3- Simply tap the 5 to 6 times the cartridge.
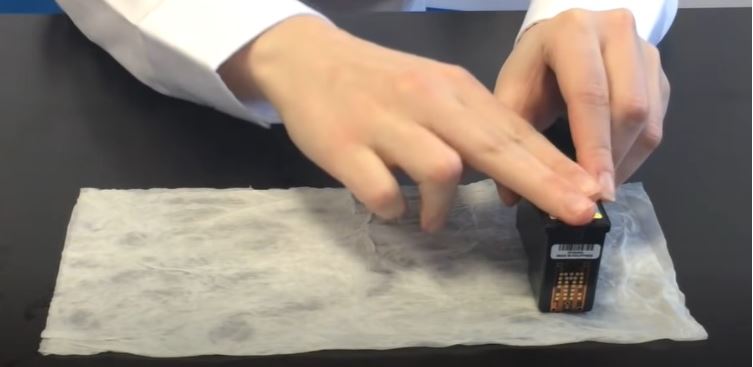
4- Rub the cartridge nozzle on the paper towel while tapping the cartridge and check the ink lines until the ink color is clear without any lines and spaces.
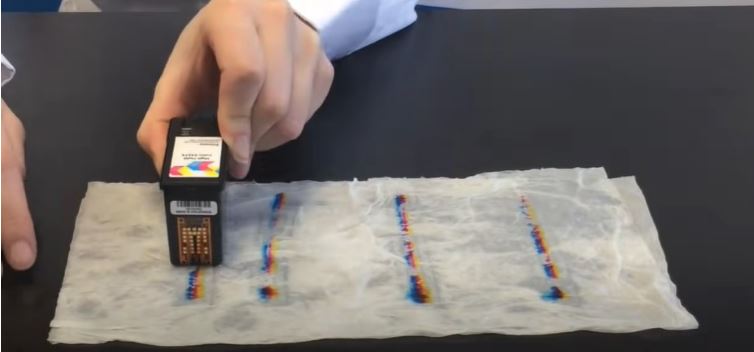
5- Once you get the clear ink onto the paper towel then you’re good to go for inserting the cartridges again.
Besides this method, there is also another method that can be utilized if your cartridges are still clogged.
Here are the supplies you’ll need
- A bowl of lukewarm distilled water
- Unscented alcohol-based hand sanitizer
- Paper towel or a lint-free cloth
Step 1: Removing cartridges
First of all, you need to remove the cartridges from your printer by raising the lid of the printer where the cartridges are located.
Step 2: Applying the sanitizer
Now carefully apply the hand sanitizer onto the nozzle of the cartridges and rub the nozzle for a few seconds and wait until the dried ink gets wet. After a few seconds, take a clean cloth or paper towel and clean the sanitizer from the nozzle.
Note: If you don’t have the unscented sanitizer then simply don’t use any other, here is another way. Simply start by soaking the cartridges in the bowl of water.
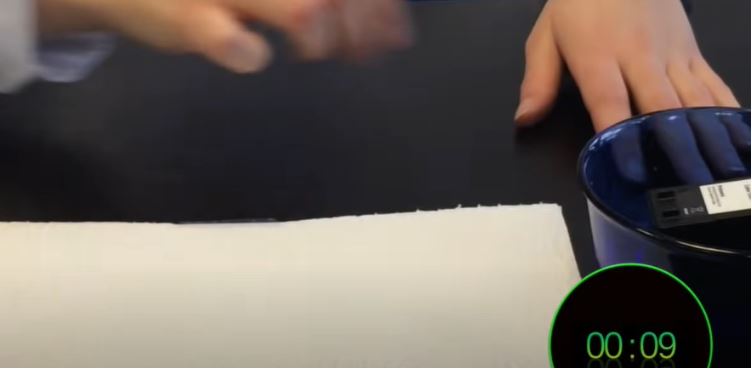
Step 3: Soaking the cartridges
Now put the cartridges inside the water bowl but make sure only put the nozzle side and printhead underwater, not the whole cartridge. Put the cartridge underwater for at least 10 seconds.
Step 4: Checking the cartridges
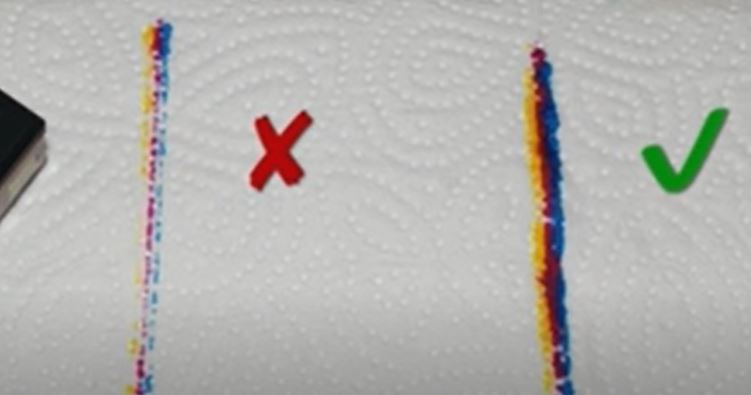
After 10 seconds, take the cartridges out of the water bowl and rub the cartridge nozzle on a clean paper towel in order to eliminate the clogging. Rub the cartridges 4 to 5 times until you get the desired lines without having any space or line as shown in the image.
After cleaning the cartridges, if you get the desired results then it’s time to insert the cartridges into the printer. But make sure to clean the cartridges with a clean paper towel to eliminate the water when taking out of them out from the bowl and then inserting them.

Conclusion
There are various methods to fix the dry ink cartridges. However, we’ve shared the prominent and result-oriented methods with you. We hope that these methods will help you to solve the dry ink issue with your cartridges. If none of them works then the final solution will be replacing dried cartridges will new ones. That is why it is crucial for you to know how to prevent ink cartridges from drying out. Read also how to get printer ink off hands.