How To Do Sublimation With Cricut Maker Using Design Space
Do you own a Cricut maker and thinking about whether you can utilize it for sublimation or not? The stance is clear that the Cricut cutter itself is not capable to produce any kind of print on paper rather it is used for cutting.
But there are other remarkable ways to do sublimation with Cricut. So in today’s guide, we’ll discuss how to do sublimation with Cricut and the two possible ways to utilize Cricut. After knowing the ways, you’ll be able to sublimate mugs, tumblers, t-shirts, and desired substrates.
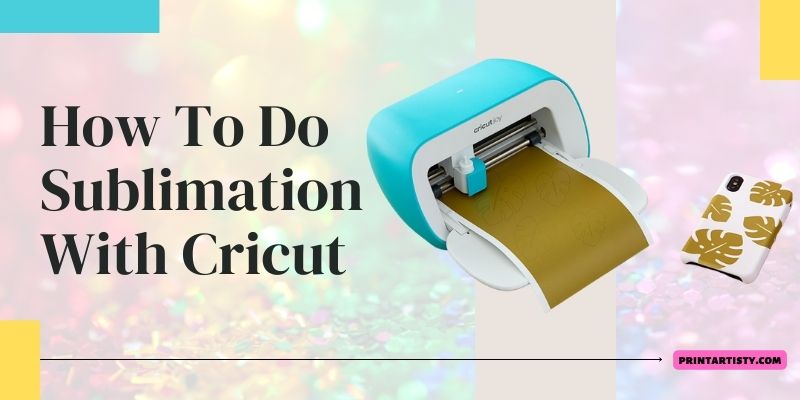
How To Do Sublimation With Cricut
The first method to do sublimation with Cricut is by utilizing the Cricut design space to use the Print-then-cut feature with a Cricut sublimation printer and the second is by utilizing the pre-made Cricut infusible ink sheets.
What Do I Need For Sublimation With Cricut?
- A Cricut sublimation printer
- Sublimation inks
- Sublimation papers
- Cricut plotter
- Light grip mat
- A heat press
Step By Step Guide: How To Do Sublimation With Cricut Explore Air 2
Step 1: Before getting started, make sure to calibrate the printer with Cricut to use the feature print then cut. Next thing, we’re going to have a look at the Cricut uploading design size. The maximum size Cricut design space can accommodate is 9.25″ x 6.75”.
Also, keep in mind that the Cricut design space doesn’t support any kind of ICC profiles. So before that, I would suggest you install the ICC profiles on your laptop. ICC profiles will make sure you’ll get exceptional printing results.
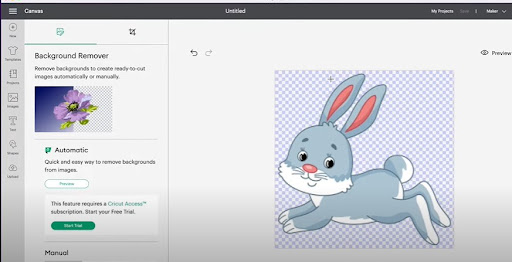
Step 2: Now the next step is to download and save the image in PNG format. Also, you’ll get plenty of reusable templates in the Cricut design space. After saving, drag the image over the upload option and select the complex option. The reason behind selecting this option is you can remove the background by using the “select” feature.
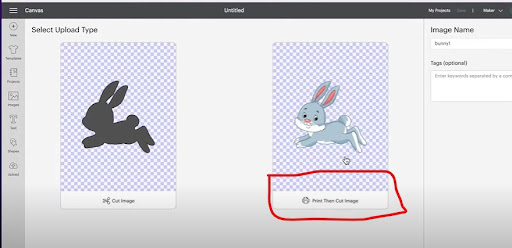
Step 3: Now Move forward and press & continue. After that, you will get two options, the first will be “Cut Image” and the second one will be “Print Then Cut Image”. Before selecting, make sure the image is mirror-inverted (Important). Select the option print then cut. Press upload and select the image and add it to the canvas.
Step 4: The image will be tiny so you have to stretch the image out and make sure it should not exceed the Cricut design space size which is 9.25 by 6.5 inches. You should resize your design according to the size of your substrate. Other than that, you can add customized fonts, texts, and stickers to your design. Now press the make it.
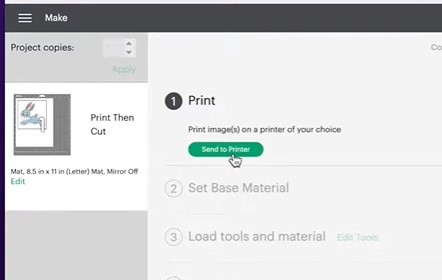
Step 5: Now, you can print the image on the sublimation paper using the Cricut sublimation printer. The next step is to send the command to the printer to print the image. You can turn the bleed option on or off, what the bleed option does is make the edges blur but that piece of paper is usually cut off. So it completely depends upon your preference.
But One option I recommend turning on is system dialogue. That option allows customizing the printer setting accordingly. Now go ahead and press “Print”. Check the image below:
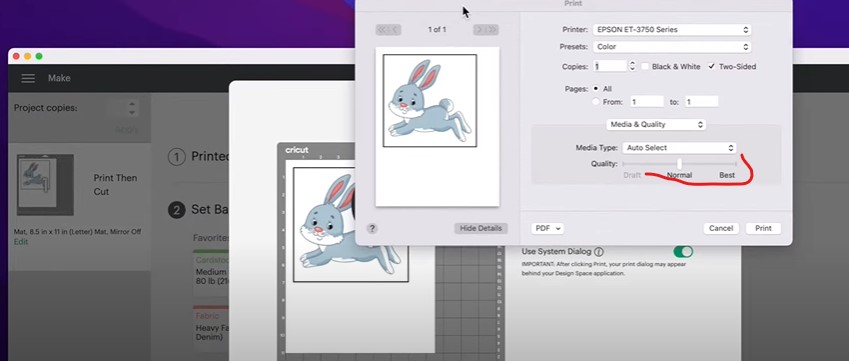
Step 6: The dialogue box will be behind the Cricut design space. Just drag down the Cricut design space and you’ll get the dialogue box. Now set the print quality from normal to best so you can get fine print quality. Also, make sure to select the option colors, not the monochrome.
Additionally, another pop-up will appear for the ICC profiles then make sure to select your sublimation printer, go to color correction, and select no color management.
Now go ahead and print the image. I am using ET-3750 with Cricut.
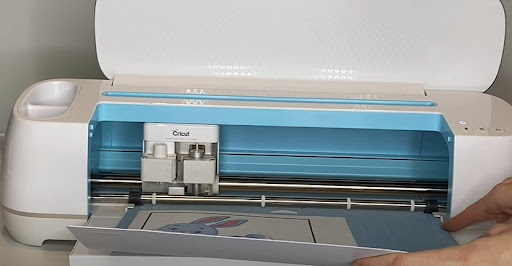
Step 7: Now place the printed sublimation paper onto the Cricut light mat and feed it into the Cricut and press the “C” to start cutting the paper. Once the image is cut you’re ready to transfer your design onto the substrate.
Method 2: Using Cricut Infusible ink sheets
In this method, I won’t need to use any printer instead, I’ll use premade infusible ink sheets. They are pre-printed sublimation ink sheets, you can use them for sublimation mugs, tumblers, shirts, and other poly-coated blanks too, But today, I’m gonna do sublimation on mugs with Cricut.
However, you cannot print your customized designs with Cricut infusible ink sheets because they come with pre-printed patterns available in a limited number at online shops.
Supplies You Will Need
- Cricut Infusible ink sheets
- Mug sublimation blanks
- A Cricut plotter
- Cricut mug heat press/Cricut Easy press for shirts
- Heat-resistant gloves and tape
- Lint roller
- Butcher paper
Step 1: Upload the text or design in the Cricut design space that you want to sublimate on the substrate. Make sure to mirror the image and resize the image according to the size of your mug or substrate. Go ahead and press the make it.
Step 2: You’ll get the two options, in the above method we selected the Print-then-cut option but in this method, we’re gonna select the “Cut image” option.
Step 3: Now place the infusible ink sheet onto the light mat grip and make sure to press the surface with your hand thoroughly in order to eliminate the wrinkles.
Step 4: Load the grip mat into the Cricut cutter and start cutting the design. After that, weed out the negative sides to make the design visible.
Step 5: Clean the mug with a lint roller and place the weeded transfer sheet onto the mug and tape it down with heat-resistant tape wrapped with butcher paper. Place the mug into the Cricut mug press and wait for a couple of minutes to get the mug printed. For more details, you can visit how to sublimate a mug.
Conclusion
So we’ve broken down the mystery to do the sublimation with Cricut. You would have the freedom to choose between the detailed written methods on how to do sublimation with Cricut. That completely depends upon your preferences to choose. But we emphasize getting poly-coated blanks or polyester fabric to eliminate the mess.
Also, white or light color substrates are preferred to unlock the hidden beauty of sublimation. Do you have other prominent methods? Hit the comment section and let us know.

